Check this link below.

It is a cloud services operating system that serves as the development, service hosting and service management environment for the Windows Azure platform. I will be posting latest updates on Windows Azure
Thursday, December 16, 2010
Performance in Windows Azure and Azure Storage
Configuration Changes to Windows Azure Diagnostics in Azure SDK v1.3
The configuration of Windows Azure Diagnostics (WAD) was changed in the Windows Azure SDK v1.3 release. This post is a follow-on to three earlier posts on Windows Azure Diagnostics – overview, custom diagnostics and diagnostics management – and describes how WAD configuration is affected by the Azure SDK v1.3 changes ...
Check this link for continuation
Detail topics on Azure
Check the links for Detail topics on Azure
Service Runtime in Windows Azure --> http://convective.wordpress.com/2010/03/18/service-runtime-in-windows-azure/
Auto scaling in Windows Azure --> http://convective.wordpress.com/2010/10/12/autoscaling-in-windows-azure/
Local Storage on Windows Azure --> http://convective.wordpress.com/2009/05/09/local-storage-on-windows-azure/
Interrole Communication Example in Windows Azure
Hi Friends,
Check this links below which describes about Internal End Points of Azure with examples
Inter role Communication Example in Windows Azure
http://blogs.msdn.com/b/hakoman/archive/2010/06/26/interrole-communication-example-in-windows-azure.aspx
Creating an external facing Azure Worker Role endpoint
Limitation on the number of internal endpoints per worker/ web role
You can have a maximum of 5 incoming endpoints per role (input or internal, doesn't matter). You can have a maximum of 5 roles. 5 * 5 = 25
Tuesday, December 14, 2010
Persisting a workflow Sample
Persisting a workflow means to store a workflow in a durable medium to be loaded for later use. Some workflows are executed very shortly that they don’t need to be persisted. However, some workflows are long-running and are not completed for some period of time. This article shows how a workflow is persisted to a database and how to load it to continue execution.
Check this Aryicle below for more details. (To demonstrate how to persist a workflow, I’ll be reusing an application from my previous article entitled WPF and the Model View View Model pattern. Currently, it lets a user submit a new sales order and is added to a collection. In this article, a workflow will be use to submit and approve a sales order.)
http://www.eggheadcafe.com/tutorials/aspnet/93c7cf86-d7d8-46bf-a7f4-d5df69e3cbd1/persisting-wf-workflows.aspx
Monday, December 13, 2010
About Persistence WorkFlow
Check the links below
Explanation with Example
http://doc.snyderit.com/essentialwindowsworkflowfoundationoct2006/pref04.htmlhttp://doc.snyderit.com/essentialwindowsworkflowfoundationoct2006/pref04.htmlAnother Persistence Workflow Sample
http://consultingblogs.emc.com/owainwragg/archive/2009/07/07/15661.aspxSqlWorkflowPersistenceService in Windows Workflow Foundation
http://nayyeri.net/sqlworkflowpersistenceservice-in-windows-workflow-foundationFriday, December 10, 2010
Windows Workflow Foundation in .NET4
WWF sample developed in .Net 4.0
Execute a Long-Running Workflow Using Persistence in Windows WF
http://www.devx.com/dotnet/Article/32247/1954
Window Workflow Foundation Runtime Services: The Persistence Service
Check this link for detailed explanation:
Windows Workflow 4.0
Using Persistence Services Sample
Check this link below
Custom Persistence Service Sample
Check this link below
SQL Workflow Instance Store
One thing I've noticed is that if I persist a Workflow in the SQL Database persistence store, and then load it back into the application later and complete the workflow, the record is removed from the persistence store when the last activity of the workflow completes. I need to find out if this functionality is by design to keep the database from getting huge, or if I'm doing something wrong.
This delete behavior is configurable. For example, if you are using the WorkflowServiceHost and are using code to configure your service host, you could set the SqlWorkflowInstanceStoreBehavior.InstanceCompletionAction to InstanceCompletionAction.DeleteNothing as in the following example:
WorkflowServiceHost host = new WorkflowServiceHost(workflow, baseAddress);
SqlWorkflowInstanceStoreBehavior persistenceBehavior = new SqlWorkflowInstanceStoreBehavior(connString);
persistenceBehavior.InstanceCompletionAction = InstanceCompletionAction.DeleteNothing;
host.Description.Behaviors.Add(persistenceBehavior);
For more information on features of the SQL workflow instance store and how you can configure it, check out this MSDN article.
Thursday, December 09, 2010
Azure + Bing Maps: Federated authentication with AppFabric ACS and Windows Live Messenger Connect
Hi Friends,
Check this link below
Windows Azure: Connecting to web role instance using Remote Desktop
My last posting about cloud covered new features of Windows Azure. One of the new features available is Remote Desktop access to Windows Azure role instances. In this posting I will show you how to get connected to Windows Azure web role using Remote Desktop.
I suppose you have other deployment settings in place and only Remote Desktop needs configuring. Open publish dialog of your web role project in Visual Studio 2010.

In the bottom part of this dialog you can see the link Configure Remote Desktop connections… Click on it.

Also Remote Desktop needs certificate. You can create one from dropdown – there is option in the end of options list. After creating certificate you have to export it to your file system (Start => Run => certmgr.msc).

When certificate is exported add it to your hosted service in Windows Azure Portal.

Now fill username and password fields in Remote Desktop settings windows in your Visual Studio and click OK. After deploying your project you can access your web role instance over Remote Desktop. Just click on your instance in Windows Azure Portal and select Connect from toolbar. RDP-file for your web role instance connection will be downloaded and if you open it you can access your web application. For username and password use the same username and password you inserted before.

This is System window of my web role instance. You can see that Small instance account provided to MSDN Library subscribers has 2.10 Gz AMD Opteron processor (only one core is for my web app), 1.75 GB RAM and 64bit Windows Server Enterprise Edition.
Using Remote Desktop you can investigate and solve problems when your web application crashes, also you can make other changes to your web role instance. If you have more than one instance you should to same changes to all instances of same web role.
How to Resolve “SetConfigurationSettingPublisher needs to be called before FromConfigurationSetting can be used” After Moving to Windows Azure SDK 1.3
If you’re receiving this exception after migrating a web role from Windows Azure SDK 1.2 to SDK 1.3, this may have to do with changes associated with the new full IIS model introduced in SDK 1.3. This post will help you to understand the change and how to use the
FromConfigurationSetting method correctly under the full IIS model. If you want to simply go back to using the Hosted Web Core model (as in previous SDK releases), you can do that too.The Full IIS Model
Full IIS in Windows Azure introduces new capabilities, such as hosting multiple web sites within a single web role and advanced IIS configuration. For a discussion of the new full IIS hosting model in Windows Azure SDK 1.3 and how it differs from the Hosted Web Core model used previously, see “New Full IIS Capabilities: Differences from Hosted Web Core” on the Windows Azure blog.
The following diagram from that post illustrates one difference that impacts how
FromConfigurationSetting is used:
With the Hosted Web Core model,
RoleEntryPoint code (e.g., WebRole.cs) and web application code (e.g., Default.aspx.cs for ASP.NET) were executed in the same app domain. Under full IIS, these are two distinct app domains. This means that static objects are no longer shared between these two parts of your application, and that’s the key to understanding how to use FromConfigurationSetting in the new full IIS hosting model.Before: FromConfigurationSetting with Hosted Web Core
The Hosted Web Core model, where everything ran in the same app domain, lead to a common pattern for initializing
CloudStorageAccount objects. This is how SDK 1.2 code was commonly written:In the
OnStart method of WebRole.cs: CloudStorageAccount.SetConfigurationSettingPublisher((configName, configSettingPublisher) =
{
var connectionString =
RoleEnvironment.GetConfigurationSettingValue(configName);
configSettingPublisher(connectionString);
}
);
(Your function may look more complicated than this, but the information in this post still applies.) Then, in
Default.aspx.cs (or an ASP.NET MVC controller): var account = CloudStorageAccount.FromConfigurationSetting("MyConnectionString");
This code worked, because the call to
SetConfigurationSettingPublisher was made in the same app domain as the call to FromConfigurationSetting. However, under the full IIS hosting model, these are two different app domains.After: FromConfigurationSetting with full IIS
A convenient place to put the call to
SetConfigurationSettingPublisher is in the Application_Start method, which runs as part of the app domain where all your web application code runs. This method is located in Global.asax.cs. (If you don’t have a Global.asax.cs already, you can add one by right-clicking on the web application project, choosing “Add,” “New Item,” and then “Global Application Class.”) void Application_Start(object sender, EventArgs e)
{
CloudStorageAccount.SetConfigurationSettingPublisher((configName, configSettingPublisher) =>
{
var connectionString = RoleEnvironment.GetConfigurationSettingValue(configName);
configSettingPublisher(connectionString);
}
);
}
This is exactly the same code that would have been in
WebRole.cs, just moved to a location that’s part of the web application’s app domain.An Alternative
The combination of
SetConfigurationSettingPublisher and FromConfigurationSetting abstracts the location of the configuration setting. Some people use this to write code that works both inside and outside of Windows Azure, reading configuration settings from Windows Azure when available and falling back to web.config or some other location otherwise.If you don’t need this abstraction layer, you can use another method of initializing
CloudStorageAccount objects from configuration settings: var account = CloudStorageAccount.Parse(RoleEnvironment.GetConfigurationSettingValue("MyConnectionString"));
Reference : http://blog.smarx.com/posts/how-to-resolve-setconfigurationsettingpublisher-needs-to-be-called-before-fromconfigurationsetting-can-be-used-after-moving-to-windows-azure-sdk-1-3
Tuesday, December 07, 2010
Hosting workflow services in Windows Azure
Since the latest release of the Windows Azure Development Kit (June), Azure provides support for .NET 4 applications, which is a real important step from the point of adoption, I believe.
The first thing we wanted to try was to host a XAMLX Workflow Service in a web role on Azure.
Example workflow service
I created a standard Workflow Service that accepted two parameters, on one operation (Multiply) and returns the result of the multiplication to the client. This service was called Calc.xamlx.
These are the steps I followed to make my service available. I added the exceptions, because that’s typically what users will search for J
Enable visualization of errors
Standard behavior of web roles, is to hide the exception for the users, browsing to a web page. Therefore, it is advised to add the following in the system.web section of the web.config:
<customErrors mode="Off"/>
Configure handler for Workflow Services
The typical error one would get, when just adding the Workflow Service to your web role and trying to browse it, is the following:
The requested url '/calc.xamlx' hosts a XAML document with root element type 'System.ServiceModel.Activities.WorkflowService'; but no http handler is configured for this root element type. Please check the configuration file and make sure that the 'system.xaml.hosting/httpHandlers' section exists and a http handler is configured for root element type 'System.ServiceModel.Activities.WorkflowService'.
We need to specify the correct HTTP handler that needs to be used for XAMLX files. Therefore, we link the workflow services and activities to the correct Workflow Service ServiceModel handler.
To solve this, the following needs to be added to the web.config.
<configuration>
<configSections>
<sectionGroup name="system.xaml.hosting" type="System.Xaml.Hosting.Configuration.XamlHostingSectionGroup, System.Xaml.Hosting, Version=4.0.0.0, Culture=neutral, PublicKeyToken=31bf3856ad364e35">
<section name="httpHandlers" type="System.Xaml.Hosting.Configuration.XamlHostingSection, System.Xaml.Hosting, Version=4.0.0.0, Culture=neutral, PublicKeyToken=31bf3856ad364e35"/>
sectionGroup>
configSections>
<!-- Removed other sections for clarity -–>
<system.xaml.hosting>
<httpHandlers>
<add xamlRootElementType="System.ServiceModel.Activities.WorkflowService, System.ServiceModel.Activities, Version=4.0.0.0, Culture=neutral, PublicKeyToken=31bf3856ad364e35" httpHandlerType="System.ServiceModel.Activities.Activation.ServiceModelActivitiesActivationHandlerAsync, System.ServiceModel.Activation, Version=4.0.0.0, Culture=neutral, PublicKeyToken=31bf3856ad364e35"/>
<add xamlRootElementType="System.Activities.Activity, System.Activities, Version=4.0.0.0, Culture=neutral, PublicKeyToken=31bf3856ad364e35" httpHandlerType="System.ServiceModel.Activities.Activation.ServiceModelActivitiesActivationHandlerAsync, System.ServiceModel.Activation, Version=4.0.0.0, Culture=neutral, PublicKeyToken=31bf3856ad364e35"/>
httpHandlers>
system.xaml.hosting>
configuration>
To enable consumers of our workflow service to generate their proxy classes, we want to expose the WSDL metadata of the service, by providing the following configuration section in the web.config.
Notice the simplicity of configuration, compared to WCF3.5. Making use of the default behaviors, allows us to only specify what we want to override.
<system.serviceModel>
<serviceHostingEnvironment multipleSiteBindingsEnabled="true" >
<serviceActivations>
<add relativeAddress="~/Calc.xamlx" service="Calc.xamlx" factory="System.ServiceModel.Activities.Activation.WorkflowServiceHostFactory"/>
serviceActivations>
serviceHostingEnvironment>
<behaviors>
<serviceBehaviors>
<behavior>
<serviceMetadata httpGetEnabled="true"/>
behavior>
serviceBehaviors>
behaviors>
system.serviceModel>
Testing and publishing
After successfully testing locally in the Azure Development Fabric, I uploaded and deployed the package, using the new Tools in Visual Studio to my Azure test account.
Author : Sam Vanhoutte, CODit
Taken from: http://www.codit.eu/Blog/post/2010/06/17/Hosting-workflow-services-in-Windows-Azure.aspx Monday, December 06, 2010
A Developer's Introduction to Windows Workflow Foundation (WF) in .NET 4
Check this link below to develop a WWF application
Re-Introducing the Windows Azure AppFabric Access Control Service
If you’re looking for a service that makes it easier to authenticate and authorize users within your Web sites and services, you should take another look at the Windows Azure AppFabric Access Control service (ACS for short), as some significant updates are in the works (at the time of this writing).
Opening up your application to be accessed by users belonging to different organizations—while maintaining high security standards—has always been a challenge. That problem has traditionally been associated with business and enterprise scenarios, where users typically live in directories. The rise of the social Web as an important arena for online activities makes it increasingly attractive to make your application accessible to users from the likes of Windows Live ID, Facebook, Yahoo and Google.
With the emergence of open standards, the situation is improving; however, as of today, implementing these standards directly in your applications while juggling the authentication protocols used by all those different entities is a big challenge. Perhaps the worst thing about implementing these things yourself is that you’re never done: Protocols evolve, new standards emerge and you’re often forced to go back and upgrade complicated, cryptography-ridden authentication code.
The ACS greatly simplifies these challenges. In a nutshell, the ACS can act as an intermediary between your application and the user repositories (identity providers, or IP) that store the accounts you want to work with. The ACS will take care of the low-level details of engaging each IP with its appropriate protocol, protecting your application code from having to take into account the details of every transaction type. The ACS supports numerous protocols such as OpenID, OAuth WRAP, OAuth 2.0, WS-Trust and WS-Federation. This allows you to take advantage of many IPs.
Outsourcing authentication (and some of the authorization) from your solution to the ACS is easy. All you have to do is leverage Windows Identity Foundation (WIF)—the extension to the Microsoft .NET Framework that enhances applications with advanced identity and access capabilities—and walk through a short Visual Studio wizard. You can usually do this without having to see a single line of code!
Does this sound Greek to you? Don’t worry, you’re not alone; as it often happens with identity and security, it’s harder to explain something than actually do it. Let’s pick one common usage of the ACS, outsourcing authentication of your Web site to multiple Web IPs, and walk through the steps it entails.
Outsourcing Authentication of a Web Site to the ACS
Let’s start by taking a vanilla Web site and enabling users to log in using a Google account.
Before we get started, let’s make sure we have the prerequisites covered. Here’s what we need:
- Visual Studio 2010
- Windows Identity Foundation Runtime
- Windows Identity Foundation SDK and one of the following: Windows 7, Windows Server 2008, Windows Server 2008 R2 or Windows Vista SP1
Although it’s not a hard requirement, having IIS on the machine will help; if you don’t have IIS installed, you’ll have to adjust the steps of the walkthrough here and there.
While Visual Studio requires no introduction, it will probably help to expand a bit on WIF (pronounced “dub-IF”), and why it’s a prerequisite. (For a thorough explanation of WIF, see “Programming Windows Identity Foundation” [Microsoft Press, 2010]).
WIF is an extension to the .NET Framework that provides you with a new model for dealing with authentication and user identity, a model that decouples your application from the details of how authentication takes place. Traditional authentication systems (such as the ASP.NET Membership provider APIs) force you to cope with the details of how authentication takes place. This requires you to use low-level APIs to deal with low-level constructs such as passwords, certificates and the like. WIF changes all this by offering a handy abstraction that allows you to specify an external entity to handle user authentication.
With Forms-based authentication, you specify a given page—typically login.aspx—where requests are redirected whenever the caller is not yet authenticated. With WIF, you can enlist an external entity—an IP—to be invoked whenever a user needs authentication. The ways in which the IP is chosen at design time and engaged at run time follow well-known protocols. WIF takes care of discovering which protocols should be used and enforcing communication policies accordingly. Once again, this is much easier to show than to explain.
Create the Initial Solution
Open up Visual Studio. Create a new Web site by selecting File | New | Web Site. Let’s create a new ASP.NET Web site—but first, be sure that you’ve selected the Web location as “HTTP” and configured the URL so that it’s running in IIS (see Figure 1).This will ensure a smooth run when using the WIF tools. If you have HTTPS available on your Web server, it’s a good idea to use it; although not strictly necessary for this walkthrough, it’s highly recommended on production systems and will save you some warnings from WIF.

Figure 1 Selecting an ASP.NET Web Site with HTTP as the Location
When you hit F5, you’ll see that you have a basic ASP.NET Web site, and by clicking the “Log In” link you’ll get prompted to enter a username and password. This is what we’re going to change—instead of using a username and password and handling authentication directly in the Web site, we’re going to use WIF to outsource authentication to the ACS. The ACS will in turn allow us to open up access to external IPs.
Configure an ACS Project
To begin, we need to create a project in the Windows Azure AppFabric LABS portal. The LABS portal is an environment set up specifically for allowing the community to access early bits. There’s no cost associated with AppFabric LABS, but there are also no service-level agreements or guarantees.
Open your browser and go to portal.appfabriclabs.com. You’ll be prompted to log in with a Windows Live ID. Once logged in, you’ll need to create a new project—click the “create a project” link. You’ll have to choose a project name—select something appropriate and click OK. Once complete, you’ll see an active project name (“acsdemoproject” in our example)—click it (see Figure 2).

Figure 2 Creating a Project in the Windows Azure AppFabric LABS Portal
Before you can outsource authentication to the ACS, you need to define a service namespace. Think of the service namespace as providing you with your own slice of the AppFabric LABS environment and—for the ACS—the unique component for all the URIs of the resources you’ll use when interacting with the ACS from your application. Everything contained within the service namespace is yours to control. Click “Add Service Namespace,” specify a name, choose a zone—in LABS you can only select “United States (South/Central)”—and click Create. Note that the URIs used by AppFabric are available on the public Internet and are meant to uniquely identify services; hence you must choose a namespace that hasn’t been picked by anybody else.
It’ll take a few moments, but after your service namespace activates, you’ll be able to click the “Access Control” link to start configuring the ACS for your Web site.
Now you’ve made it to the management portal, where you can configure the ACS for your Web sites (see Figure 3).

Figure 3 The Windows Azure AppFabric Access Control Service Management Portal
Click the “Manage” button to get started. The management portal provides some guided steps to walk you through the process of getting started, and that’s just what we’re going to do.
Choosing the Identity Providers You Want
Click the “Identity Providers” link. Here we want to configure the various social IPs we want to leverage from within your application. Windows Live ID is present in the list by default; let’s add support for Google accounts.
Click the “Add Identity Provider” link, which will show a list of providers. Click the “Add” button next to Google. You can specify a custom image URL for the IP, but go ahead and just click “Save.” Just like that, we’ve added Google as a recognized source of user identities.
Getting the ACS to Recognize Your Web Site
Now that our IPs have been configured, we need to provide information to the ACS about our Web site. In identity jargon, we often refer to applications as “Relying Parties,” an expression that refers to the fact that the application relies on one or more IPs to take care of authentication on their behalf. The ACS UI is consistent with this terminology.
Click the “Relying Party Applications” URL, and then “Add Relying Party Application.” Let’s specify the following information:
- Name: My Website
- Realm: https://localhost/Website/
- Return URL: https://localhost/Website/
- Token format: SAML 2.0
- Token signing: Use service namespace certificate (typical)
The Token Format field deserves at least a short explanation (we’ll spend more time on the topic later in the article). A token is an artifact—typically an XML fragment or something in another serialization format—used by IPs to indicate that a successful authentication operation took place. Once a user authenticates, using whatever system the IP chooses, the user’s browser will be redirected to the ACS carrying a token that certifies the user has been recognized. The token format and protocol used will be determined according to the IP. The ACS will examine the token and, if it finds it satisfactory (more about this later), will emit a new token of its own and send it back to your application. The settings you change in this step determine which token format you wish the ACS to use for communicating back to your application. The ACS is capable of emitting three types of tokens—SAML2.0, SAML1.1 and SWT—representing different trade-offs between expressive power, security, applicability for certain client types and so on. Just pick SAML2.0 here; the details aren’t imperative at this point.
It’s important that the realm corresponds to the URL for the Web site we created earlier. Once the authentication with the IP of choice takes place, the ACS will redirect the user back to your Web site using the URL you specify here. Note that, by default, “Create New Rule Group” is selected—we’ll leverage this in the next step. Click “Save” once you’re done and return to the management portal.
Adding Rules
Rules are interesting constructs that give you fine-grained control over user identity information. The scenario we’re enabling right now, however, doesn’t require the explicit use of rules in order to enable sign-on from multiple IPs. Therefore, we’ll postpone all explanations about what rules are to a later section in the article, where they’ll actually come in handy; here we’ll just go with the default settings.
Click the “Rule Groups” link. You should see the rule group created when we added the relying party application (“Default Rule Group for My Website”). Select this rule group, click the “Generate Rules” link, confirm that both Google and Windows Live ID are selected, and then click the “Generate” button—that’s all you need to do in regard to rules in this scenario.
Collecting the WS-Federation Metadata Address
At this point, we’re finished configuring the ACS. However, before we jump back to Visual Studio, let’s grab some information from the Application Integration page. Click the “Application Integration” link and copy the “WS-Federation Metadata” URL—we’re going to use this with WIF to set up our Web site to leverage.
Without going into too much detail, the WS-Federation Metadata document is a machine-readable description of how the ACS handles authentication. Your application will need it in order to be configured to outsource authentication to the ACS.
Configuring the Web Site to Use the ACS
Return to Visual Studio and your Web site. We now want to
leverage WIF to outsource authentication to the ACS, which will in turn enable Google accounts to access our application. In the Solution Explorer, right-click the Web site project and select “Add STS Reference.” This will launch the Federation Utility wizard, which will configure the Web site to use WIF as the authentication mechanism and the ACS as the authenticating authority. STS stands for “Security Token Service,” which indicates a special kind of Web service or Web page that offers an entry point for requesting tokens; usually every IP or token issuer uses one.
You can just click “next” most of the time; the steps in which you’ll have to enter information are precious few. Advance to the “Security Token Service” step, and specify “Use an existing STS.” Paste the federation metadata URL you copied from the ACS portal (see Figure 4).

Figure 4 Starting the Federation Utility Wizard in Visual Studio
From there, leave the defaults, click through to the end and select Finish. The wizard will add all the required WIF assemblies, add some files to your Web site and (most importantly) update your web.config with the information required to engage with the ACS at authentication time.
Testing the Authentication Flow
It’s finally time to give your newly secured Web site a spin! Hit F5. You’ll immediately be redirected to the Home Realm Discovery page, which offers the user the chance to pick among the IPs we configured earlier in the ACS management portal (see Figure 5).

Figure 5 The Home Realm Discovery Page
After you select Google and enter your Google account credentials, you’ll see an approval page that requires you to allow the ACS project access—this is important to understand, as it’s not your Web site that’s requesting permission, but instead the ACS (see Figure 6).

Figure 6 The Windows Azure AppFabric Access Control Service Asking for Permission to Get Information from Google
Once you’ve allowed the ACS the access it requires, you’ll get redirected back to the Web site (see Figure 7). That’s it—you’re logged in!

Figure 7 Success! Logging in to the Web Site
If you want to verify that the same experience would work with Windows Live ID, the other IP configured in your namespace, all you need to do is close the browser, hit F5 again and at the Home Realm Discovery page pick Windows Live ID instead of Google.
If you have any experience in enabling authentication protocols on Web sites, you know that, traditionally, adding an IP means studying its protocols and API, writing fairly challenging code and testing, testing, testing before getting it right. And every additional IP requires the same, plus the extra complication of understanding from the request which protocol is being used.
Here, we didn’t need to do any of that; in fact, you may have noticed that we didn’t write a single line of code. If we want to add extra identity providers, all we’ll need to do is go through a couple of screens on the ACS management portal, with no impact whatsoever on the application itself. If the IPs evolve their protocols, the ACS will change its code to accommodate the new conditions, and our application won’t even know anything changed at all.
The ACS: Structure and Features
Now that you’ve had a chance to experience firsthand the power of the ACS, you’re ready for a brief overview of what the ACS really is and what makes it tick. This will require a bit of theory, but you’ll discover that you already learned most of what you need to know while walking through the scenario described earlier.
The ACS operates according to the principles of claims-based identity. The main idea behind claims-based identity is that every entity in an identity transaction plays one or more canonical roles, taken from a short list of four: subject, identity provider (IP), relying party (RP) and federation provider (FP). In the walkthrough, you’ve seen all those in action. The interaction among those entities boils down to requesting, obtaining and forwarding security tokens, as shown in Figure 8.

Figure 8 Requesting, Obtaining and Forwarding Security Tokens
The subject is the role played by the user—that is, the entity that needs to be authenticated. The IP is the entity that stores the account for the subject: username, credentials, attributes and so on. The IP uses one or more STSes for exposing its authentication capabilities and for issuing tokens. The RP is the application that the subject wants to use. Those three roles are enough for describing the most basic case: the subject obtains a token from an IP that the RP trusts, uses that token with the RP and the authentication is done.
One thing we didn’t cover during the walkthrough is that the tokens aren’t just representing the successful outcome of the authentication operation, but they’re also used to transport attributes describing the user: name, e-mail address roles and anything else that the RP needs to know and that the IP makes available. If you recall the properties of signed security tokens, you’ll see how those attributes can’t be tampered with and are cryptographically guaranteed to come from a specific IP. That means that one RP can choose to consider valid the attributes it receives according to how much it trusts the IP that originated them. Think of real-life situations in which you need to prove something—for example, that you actually live at a certain address. Companies often ask you to provide a utility bill, mainly because they trust the utility company more than they trust you. The information is the same (the address), but the IP that produced it makes all the difference.
When an attribute is issued as part of a security token, we call that attribute a claim. This concept is so important that it gives the name to the entire approach, and practically everything the ACS does revolves around claims. We just need to get another concept out of the way and then we’ll go in the details.
Although you could use the subject-RP-IP roles for modeling every system, in practice it’s not very handy. If one RP trusts multiple IPs, as was the case in our scenario, the model would require the RP to maintain multiple relationships, handle different protocols and so on. This is where the fourth role, the FP, comes into play. An FP is an intermediary between one or more RPs and one or more IPs, as shown in Figure 9.

Figure 9 The Federation Provider as an Intermediary
The FP trusts multiple IPs, behaving like an application and expecting tokens from the IPs. In turn, the RP trusts the FP; to that purpose the FP exposes its own STS, which issues tokens for the RP. The FP takes care of the details of engaging with the various IPs, while always presenting to the RP the same façade, so IPs can be on-boarded and de-provisioned without affecting the RP. The FP can also transform the claims coming from different IPs to make them more useful for the RP. It can normalize different incoming claim types, add extra claims such as roles or permissions, and so on.
As you may have guessed by now, the ACS plays the role of the FP, as illustrated in Figure 10.

Figure 10 The Windows Azure AppFabric Access Control Service Playing the Role of Federation Provider
When you create a service namespace, you get your very own full-featured FP in the cloud. Out of the box, that FP includes four different STS endpoints, all offering different protocols that are suitable for different application types: WS-Federation for signing in to Web sites; WS-Trust for invoking SOAP Web services; OAuth WRAP and OAuth 2 for REST Web services; and Web APIs in general. Those are the endpoints you use to configure your application to outsource authentication.
The ACS is already pre-configured to trust various Web IPs, as we’ve seen, and it facilitates the experience of choosing among them by providing pages or embeddable code for them. In addition to that, the ACS is able to establish trust with commercial IPs such as Active Directory Federation Services 2.0 (AD FS 2.0), which expose STS endpoints themselves. In practice, the ACS exposes the counterpart of the “Add STS reference” functionality you’ve seen when configuring your Web site to trust the ACS. Using AD FS 2.0 as an IP is extremely interesting, as it allows you to reuse user accounts whenever you want, including those in Windows Azure-hosted applications that would traditionally be valid only on-premises. Another interesting feature of business IPs is that they usually provide much richer claims sets that can be used for adding sophisticated identity-driven logic in the token processing.
The ACS allows you to describe your claims transformation login in the form of rules, a simple but powerful mechanism. For example, you can assign a role to a user as simply as entering something along the lines of “if the incoming name identifier claim has value X, please add an output claim of type role and value Y.”
All of the functionality discussed here can be accessed through the management portal you used in the walkthrough; alternatively, there’s an OData-based management service that gives you full control on the ACS settings while integrating with your existing processes.
As trite as it may sound, we did barely scratch the surface of what the ACS can do for you. We invite you to check out the hands-on lab in the identity developer training kit and the Windows Azure platform training kit for exploring more scenarios in greater detail. If you want to simplify access management for your Web site, Web service or Web API, the ACS can help!
Content Taken from : http://msdn.microsoft.com/en-us/magazine/gg490345.aspx
Author : Vittorio Bertocci and Wade Wegner
Pushing Content from SharePoint to Windows Azure Storage
Hi Friends,
Want to push Sharepoint Content onto Windows Azure Storage?
Check the link below for more details
Sunday, December 05, 2010
New Full IIS Capabilities: Differences from Hosted Web Core (HWC)
The new Windows Azure SDK 1.3 supports Full IIS, allowing your web roles to access the full range of web server features available in an on-premise IIS installation. However if you choose to deploy your applications to Full IIS, there are a few subtle differences in behaviour from the Hosted Web Core model which you will need to understand.
What is Full IIS?
Windows Azure's Web Role has always allowed you to deploy web sites and services. However many people may not have realised that the Web Role did not actually run the full Internet Information Services (IIS). Instead, it used a component called Hosted Web Core (HWC), which as its name suggests is the core engine for serving up web pages that can be hosted in a different process. For most simple scenarios it doesn't really matter if you're running in HWC or IIS. However there are a number of useful capabilities that only exist in IIS, including support for multiple sites or virtual applications and activation of WCF services over non-HTTP transports through Windows Activation Services.
One of the many announcements we made at PDC 2010 is that Windows Azure Web Roles will support Full IIS. This functionality is now publicly available and included in Windows Azure SDK v1.3. To tell the Windows Azure SDK that you want to run under Full IIS rather than HWC, all you need to do is add a valid
A simple section defining a single website looks like this:

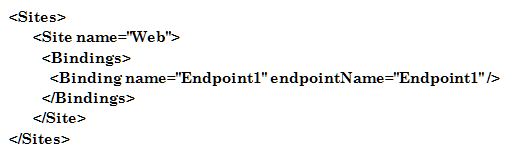
You can easily customise this section to define multiple web sites, virtual applications or virtual directories, as shown in this example:

After working with early adopter customers with Full IIS for the last couple of months, I've found that it's now easier than ever to port existing web applications to Windows Azure. However I've also found a few areas where you'll need to do things a bit differently to you did with HWC due to the different hosting model.
New Hosting Model
There is a significant difference in how your code is hosted in Windows Azure depending on whether you use HWC or Full IIS. Under HWC, both the RoleEntryPoint methods (e.g. the OnStart method of your WebRole class which derives from RoleEntryPoint) and the web site itself run under the WaWebHost.exe process. However with full IIS, the RoleEntryPoint runs under WaIISHost.exe, while the web site runs under a normal IIS w3wp.exe process. This can be somewhat unexpected, as all of your code belongs to the same Visual Studio project and compiles into the same DLL. The following diagram shows how a web project compiled into a binary called WebRole1.dll is hosted in Windows Azure under HWC and IIS.

This difference can have some unexpected implications, as described in the following sections.
Reading config files from RoleEntryPoint and your web site
Even though the preferred way of storing configuration in Windows Azure applications is in the ServiceConfiguration.cscfg file, there are still many cases when you may want to use a normal .NET config file - especially when configuring .NET system components or reusable frameworks. In particular whenever you use Windows Azure diagnostics you need to configure the DiagnosticMonitorTraceListener in a .NET config file.
When you create your web role project, Visual Studio creates a web.config file for your .NET configuration. While your web application can access this information, your RoleEntryPoint code cannot-because it's not running as a part of your web site. As mentioned earlier, it runs under a process called WaIISHost.exe, so it expects its configuration to be in a file called WaIISHost.exe.config. Therefore, if you create a file with this name in the your web project and set the "Copy to Output Directory" property to "Copy Always" you'll find that the RoleEntryPoint can read this happily. This is one of the only cases I can think of where you'll have two .NET configuration files in the same project!
Accessing Static Members from RoleEntryPoint and your web site
Another implication of this change is that any AppDomain-scoped data such as static variables will no longer be shared between your RoleEntryPoint and your web application. This could impact your application in a number of ways, but there is one scenario which is likely to come up a lot if you're migrating existing Windows Azure applications to use Full IIS. If you've used the CloudStorageAccount class before you've probably used code like this to initialise an instance from a stored connection string:
var storageAccount = CloudStorageAccount.FromConfigurationSetting("ConnectionString");
Subscribe to:
Posts (Atom)